
Cook Smarter, Not Harder: Our 6-Step Camping Cookware & Stove Blueprint
We’ll guide you through choosing the right camping cookware and mastering stoves so meals are fast, tasty, and reliable, whether you’re backpacking light or cooking for a crew. Fun fact: with the right setup, we can boil water in under two minutes.
What We’ll Need

Ultimate Outdoor Cooking: Top Camping Stoves for the Best Experience
Step 1 – Define Our Camping Style and Meal Needs
Are we ultralight lone wolves or feast-for-twelve car campers? The answer drives everything.Clarify how and where you’ll camp. Decide if you’re solo backpacking, bikepacking, car camping, or group base camping. Because allowable weight, pack volume, and cooking complexity change everything.
Estimate meals per day, typical recipes, and group size so you can choose the right gear. Ask: are we doing boil-only dehydrated meals, simple sautéing, or full multi-course dinners?
Measure portions: plan liters per person and add 25–50% headroom. Estimate weight and packed volume before you move on to cookware choices.

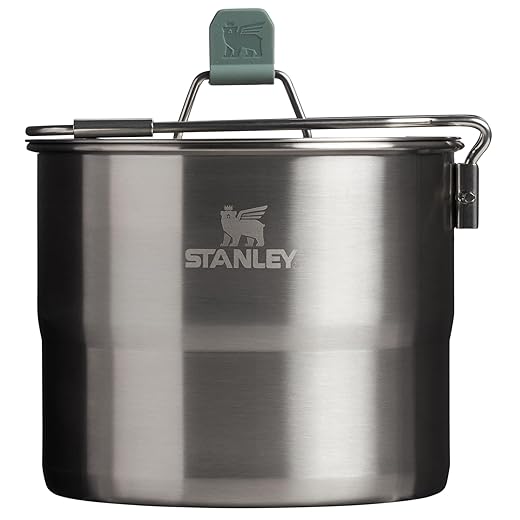
Step 2 – Pick the Right Camping Cookware Material
Aluminum for speed? Titanium for bragging rights? Here’s what actually matters.Compare common cookware materials and pick what matches your trip. Focus on weight, heat spread, durability, and cleaning needs.
Consider nonstick coatings for easy cleanup; use low heat and plastic/wood utensils. Favor hard-anodized or midweight aluminum camping cookware for multi-day backpacking, choose titanium for ultralight outings, and pick stainless or heavy anodized for car camping and longevity.

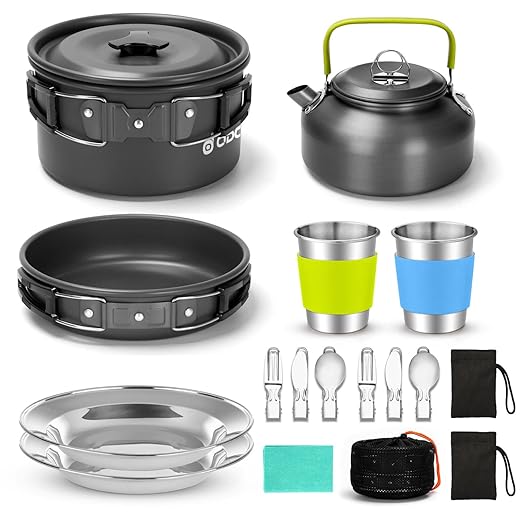
Step 3 – Choose Configuration: Sets vs Single Pieces
Do we need ten pots or one clever pot that does it all? Spoiler: less is usually better.Decide between nested cookware sets, single multi-use pots with versatile lids, and add-ons like fry pans, kettles, or mugs. Balance versatility (a pot that boils, steams, and simmers) against convenience (a dedicated frying pan for eggs).
Balance nesting and multi-use: nested sets save pack volume; true multi-use pieces cut weight. Pick a primary pot sized for our group, and carry a lightweight pan for breakfasts or searing.
Pick and include these essentials:
For example, on a two-night trip, we’ll choose a 1.8 L pot with a nesting 8″ pan instead of a full 6-piece set.
Step 4 – Choose Stove Type and Fuel Strategy
Canister stoves for instant boils or white gas for Arctic adventures? We weigh practicality vs performance.Choose stove type and fuel based on season, remoteness, and group size. Evaluate canister, liquid, alcohol, wood, and multi-fuel options for fuel availability, simmer control, boil times, maintenance, spare parts, and pot stability.
For example, on a three-day spring trip with two people, we pack a canister stove; for a week in the high Sierras in winter, we choose a liquid-fuel unit.

Step 5 – Match Camping Cookware to Stove and Cooking Style
The right pot on the wrong stove wastes fuel. Let’s squeeze every BTU out of our setup.Match flat-bottomed pots with small canister burners for full contact and fast boils.
Use heat-exchanger pots on low-power stoves to boost efficiency and shorten boil times.
Stabilize wide frying pans with a stable burner, pot support, or windshield to prevent tipping.
Manage simmer control by choosing stoves with low-output settings or by lifting the pot off the flame; practice with water to learn flame-to-pot response.
Improve fuel economy with simple tactics:
Protect nonstick coatings by using lower heat and silicone/wood utensils.
Avoid warping by matching pot size to burner output and not running thin pans on sustained high output.
Illustrate with an example: on a windy ridge, we added a windshield and a heat-exchanger pot, stretching fuel by two meals.
Step 6 – Pack, Maintain, and Practice with Us
Practice makes perfect: a home test run saves a campsite disaster. Seriously.- Nest camping cookware compactly: stack pots, place lids inside, and pad nonstick surfaces with a dish towel or foam to prevent scratches.
- Use stuff sacks or compression straps to stabilize gear and keep knives or utensils from rubbing coatings.
- Store fuel upright in a cool, ventilated spot and carry spare fuel in original containers. Never mix or decant into soft packs.
- Establish cleaning and drying routines: rinse food, scrub with biodegradable soap 200+ feet from water, and air-dry completely to prevent corrosion.
- Perform seasonal maintenance: re-coat worn nonstick surfaces, replace stove O-rings and gaskets, and clean jets with the manufacturer’s tool.
- Test-cook at home to tune simmering, record real boil times, and confirm spare parts fit.
Pre-trip checklist

From Plan to Plate: Cook Confidently
If we match camping cookware to our style, pick the right stove, and practice, we’ll eat well anywhere. Use the checklist, run a test cook, refine our setup trip by trip, then share results and inspire others to try starting today.